Slay the Spireを全キャラクターで心臓を倒した。
アセンションはレベル0
50時間くらい溶けた。
アイアンクラッド
バリケードと不動を積んで殴る

サイレント
毒入れて弱体化させてナイフなげる

ディフェクト
フロストでディフェンス固めてちまちま殴る

ウォッチャー
平静で防御を固めてマントラ貯める

PythonでAWSの月間利用料を取得するスクリプトをかきました。
今回のものは他のPythonスクリプトから読み込ませることも意識しています。
これです。 github.com
python get_monthly_cost.py --help
usage: get_monthly_cost.py [-h] [--profile [PROFILE]] [--year [YEAR]]
                           [--month [MONTH]]

optional arguments:
  -h, --help           show this help message and exit
  --profile [PROFILE]  Use a specific profile from your credential file.
  --year [YEAR]        Sets the year for retrieving AWS costs.
  --month [MONTH]      Sets the month for retrieving AWS costs.
$ python get_monthly_cost.py
9.4029780888 USD
$ python get_monthly_cost.py --year 2020 --month 1
10.2359175577 USD
import get_monthly_cost
response = get_monthly_cost.cost().get()
# ('9.4029780888', 'USD')
import get_monthly_cost
response = get_monthly_cost.cost(2020,1).get()
# ('10.2359175577', 'USD')

図解即戦力 Amazon Web Servicesのしくみと技術がこれ1冊でしっかりわかる教科書
CircleCIでpersist_to_workspaceとattach_workspaceを利用してJob間でファイルを共有してみます。
たとえばビルドした結果を別のJobでデプロイなどよくありがちだと思う。
こんなかんじ。
今回はテスト用にechoをリダイレクトするJobとそれを確認するJobでわけてみた。
version: 2.1

jobs:
  build:
    docker:
      - image: circleci/python:3.7
    working_directory: ~/repo
    steps:
    - run:
        command: |
          mkdir build
          echo 'wawawa' >> build/wawawa.txt

    - persist_to_workspace:
        root: ~/repo
        paths:
            - build/*
  deploy:
    docker:
      - image: circleci/python:3.7
    working_directory: ~/repo
    steps:
    - attach_workspace:
        at: ~/repo
    - run:
        command: |
          pwd
          ls -l
          ls -l build

workflows:
   main:
     jobs:
     - build
     - deploy:
         requires:
           - build
できた。
おくがふかいですね
KubernetesのPodのラベルでフィルタリングして条件に一致するリソースのみ出力してみたいと思います。
こんなかんじでpodをつくってます。
label-test.yaml
---
apiVersion: v1
kind: Pod
metadata:
  name: sample-label
  labels:
    label1: wawawa
    label2: sasasa
spec:
  containers:
    - name: test-pod1
      image: nginx
---
apiVersion: v1
kind: Pod
metadata:
  name: sample-label2
  labels:
    label1: wawawa
    label3: dadada
spec:
  containers:
    - name: test-pod2
      image: nginx
$ kubectl get pods
NAME            READY   STATUS    RESTARTS   AGE
sample-label    1/1     Running   0          40s
sample-label2   1/1     Running   0          40s
label2がsasasaであるpodのみ出力してみます。
$ kubectl get pods -l label2=sasasa
NAME           READY   STATUS    RESTARTS   AGE
sample-label   1/1     Running   0          3m58s
-Lオプションをつけるとラベル名も表示してくれます。
$ kubectl get pods -l label2=sasasa -L label2
NAME           READY   STATUS    RESTARTS   AGE     LABEL2
sample-label   1/1     Running   0          4m28s   sasasa
べんりですね

Kubernetesで実践するクラウドネイティブDevOps
VagrantでCPUの数とメモリのサイズを設定してみます。
Vagrantfileに以下のように設定します。
  config.vm.provider "virtualbox" do |v|
    v.memory = 8192
    v.cpus = 4
  end
できましたね。
$  free
              total        used        free      shared  buff/cache   available
Mem:        8166932      684508     5470900        8352     2011524     7240052
Swap:       1003516           0     1003516
$ lscpu | grep CPU
CPU op-mode(s):      32-bit, 64-bit
CPU(s):              4

Ubuntu18にMinikubeをインストールしてみます。
手順です。
sudo apt-get update -y
sudo apt-get upgrade -y
sudo apt-get install curl wget apt-transport-https -y
途中で簡易GUIがでてくるので支持に従ってインストールします。
apt-get install virtualbox virtualbox-ext-pack
公式WebサイトからMinikubeをダウンロードします。
wget https://storage.googleapis.com/minikube/releases/latest/minikube-linux-amd64
ダウンロードしたファイルを/usr/local/binにコピー
sudo cp minikube-linux-amd64 /usr/local/bin/minikube
minikubeに実行権限を付与
sudo chmod 755 /usr/local/bin/minikube
インストールできました
minikube version

minikube version: v1.7.2
commit: 50d543b5fcb0e1c0d7c27b1398a9a9790df09dfb
ローカルで開発していく。

VagrantでUbuntu18を起動してRLoginでssh接続してみます。
ローカルの適当なディレクトリで以下コマンドを実行します。
$ vagrant init bento/ubuntu-18.04
$ vagrant up
こんなかんじにします。

SSH認証鍵のところは以下を設定します。
C:\Users\ユーザ名\vagrant\ubuntu18.vagrant\machines\default\virtualbox\private_key
接続できました。
vagrant@vagrant:~$ uname -a
Linux vagrant 4.15.0-76-generic #86-Ubuntu SMP Fri Jan 17 17:24:28 UTC 2020 x86_64 x86_64 x86_64 GNU/Linux
べんりですね。
![Ubuntu はじめる&楽しむ 100%活用ガイド[Ubuntu 18.04LTS 日本語Remix対応] Ubuntu はじめる&楽しむ 100%活用ガイド[Ubuntu 18.04LTS 日本語Remix対応]](https://images-fe.ssl-images-amazon.com/images/I/51k2n%2B%2BeJyL._SL160_.jpg)
Ubuntu はじめる&楽しむ 100%活用ガイド[Ubuntu 18.04LTS 日本語Remix対応]
CircleCIでserverless frameworkのsls deployを実行したときだけ、dockerizePipを無効にしてデプロイをしてみたいと思います。
dockerizePipがtureだと以下のようなエラーが出力される。
ERROR: Could not open requirements file: [Errno 2] No such file or directory: '/var/task/requirements.txt'
原因はよくわからない。
docker-in-dockerだし…
公式のissueでも話題になっているけれど根本的な解決はなさそう。
こうする。
  custom:
    pythonRequirements:
      dockerizePip: ${self:custom.isCI.${env:CI}, self:custom.isCI.false}
    isCI:
      true: true
      false: non-linux
CircleCIで実行するときはCI=Trueとなる。
ローカル環境で実行する場合はexport CI=Falseなどで変数CIを事前に設定してあげる必要があるけれど。
解決

CircleCIで特定ブランチに変更があった場合のみCIがうごくようにしてみます。
developブランチでしかCIが動かないように設定します。
filtersを設定してdeployはdevelopブランチの場合のみ実行されるようにしています。
version: 2
jobs:
  test:
    ~~~省略~~~
  deploy:
    ~~~省略~~~

workflows:
  version: 2
  test_and_deploy:
    jobs:
      - test
      - deploy:
          requires:
            - test
          filters:
            branches:
              only:
                - develop
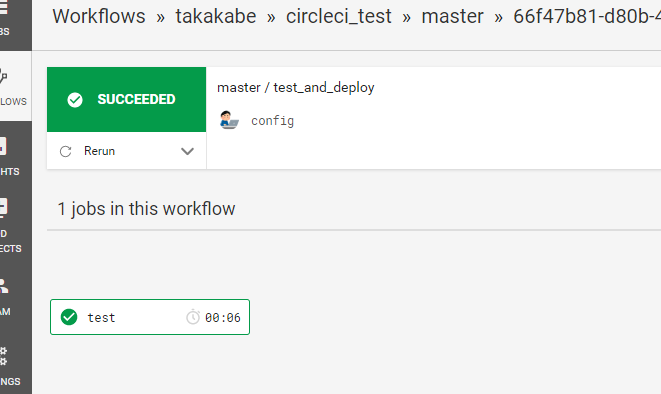
git push origin master
testしか実行されていないことがわかる。

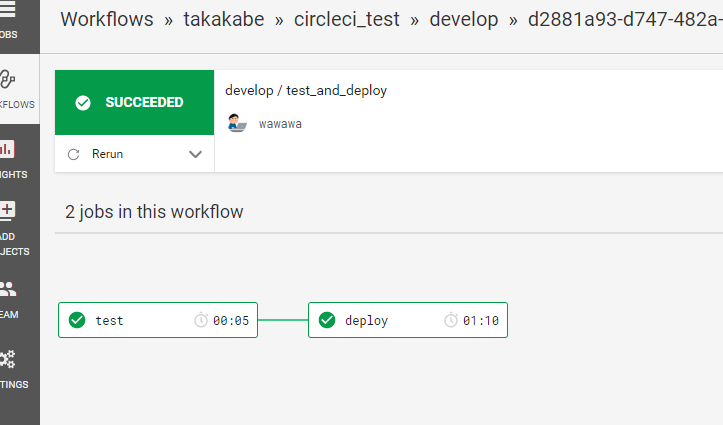
git push origin develop
testとdeployの両方が実行されていることがわかる。

べんりですね。
CircleCIで順番に実行されるworkflowをつくってみます。
ユニットテストの後、デプロイするようなイメージです。
コード等はこれを利用しています。
testとdeployのjobをつくって、Workflowの箇所でrequiresを設定してあげています。
version: 2
jobs:
  test:
    docker:
      - image: circleci/python:3.7
    working_directory: ~/repo
    steps:
      - checkout
      - run:
          name: unittest
          command: |
            python ./handler.py

  deploy:
    docker:
      - image: circleci/python:3.7.6-stretch-node-browsers
    working_directory: ~/repo
    steps:
      - checkout
      - run:
          name: Install Serverless CLI and dependencies
          command: |
            sudo npm install -g serverless
            npm install
      - deploy:
          name: Deploy
          command: |
            npm install --save serverless-python-requirements
            sls deploy

workflows:
  version: 2
  test_and_deploy:
    jobs:
      - test
      - deploy:
          requires:
            - test
無事できました。

Pythonでのunittest
import requests
import unittest

def main(event, context):
    response = requests.get('https://www.kabegiwablog.com/')
    return response.status_code

class test(unittest.TestCase):
    def test_main(self):
        self.assertEqual(main('',''),200)

if __name__ == '__main__':
    unittest.main()
    main('', '')

CCNA Collaboration CICD 210-060 Official Cert Guide
CircleCIでsls deployしようとしたらこんなかんじのエラーがでた。
Error: Cannot find module '/home/circleci/repo/node_modules/fs-extra/lib/index.js'. Please verify that the package.json has a valid "main" entry
こんなものはないっていわれている
/home/circleci/repo/node_modules/fs-extra/lib/index.js
git add -Aしてnode_modules/配下が全部GitHub上にPushされていて、CircleCIでnpm installしたときにそんなものはないと言われていた。
.gitignoreできちんとそこらへんを対象外にしてあげる

アサヒ飲料 モンスター パイプラインパンチ 355ml ×24本
CircleCIでLambda(Python)をServerless Frameworkをつかってデプロイしてみます。
GitHubにCommitされるとCircleCIでsls deployしてAWSにデプロイするようなイメージ。
手順です。
以下に役に立つページがあります。
手順5まですすめます。
CircleCIの設定ファイルであるconfig.ymlを作成します。
mkdir .circleci
touch .circleci/config.yml
config.ymlの中身はこんなかんじ。
Serverless Frameworkをインストールして、serverless-python-requirementsをインストールして、sls deployするだけです。
version: 2
jobs:
  build:
    docker:
      - image: circleci/python:3.7.6-stretch-node-browsers
    working_directory: ~/repo
    steps:
      - checkout
      - run:
          name: Install Serverless CLI and dependencies
          command: |
            sudo npm install -g serverless
            npm install
      - deploy:
          name: Deploy
          command: |
            npm install --save serverless-python-requirements
            sls deploy
CircleCIからSetup Projectして、Commit契機でうごくようにしておきます。
addしてcommitしてPushしてCircleCIをうごかします。
デプロイできました。

べんりですね

継続的デリバリー 信頼できるソフトウエアリリースのためのビルド・テスト・デプロイメントの自動化 (アスキードワンゴ)
Serverless FrameworkをつかってLambda(Python)をAWS環境にデプロイしてみます。
手順です。
今回デプロイするAWS Lambda用のServerless Frameworkのテンプレートを作成します。
serverless create --template aws-python3 --name requests-test --path ./requests-test
できました。
ls -l ./requests-test
total 8
-rw-r--r--. 1 vagrant vagrant  497 Feb  2 07:16 handler.py
-rw-r--r--. 1 vagrant vagrant 3201 Feb  2 07:16 serverless.yml
デプロイしたいLambdaのコードをかきます。
今回はhandler.pyを以下のように上書きしてしまいます。
requestsをつかってcurlするだけのPythonです。
import requests

def main(event, context):
    response = requests.get('https://www.kabegiwablog.com/')
    print(response)

if __name__ == '__main__':
  main('', '')
ローカルでちゃんと動作することがわかります。
 python3 ./handler.py
<Response [200]>
このhandler.pyの実行に必要なパッケージをrequirements.txtに記載してあげます。
pip3 freeze | grep requests > ./requirements.txt
こんなかんじ。
$ cat requirements.txt
requests==2.22.0
serverless.ymlを以下のように編集してあげます。
service: requests-test

provider:
  name: aws
  runtime: python3.7
  region: ap-northeast-1

functions:
  requests-test-lambda:
    handler: handler.main

plugins:
  - serverless-python-requirements

custom:
  pythonRequirements:
    dockerizePip: true
serverless-python-requirementsをインストールしてあげます。
これにより、requirements.txtで依存関係を自動的にバンドルしてくれます。
npm install --save serverless-python-requirements
いよいよデプロイです。
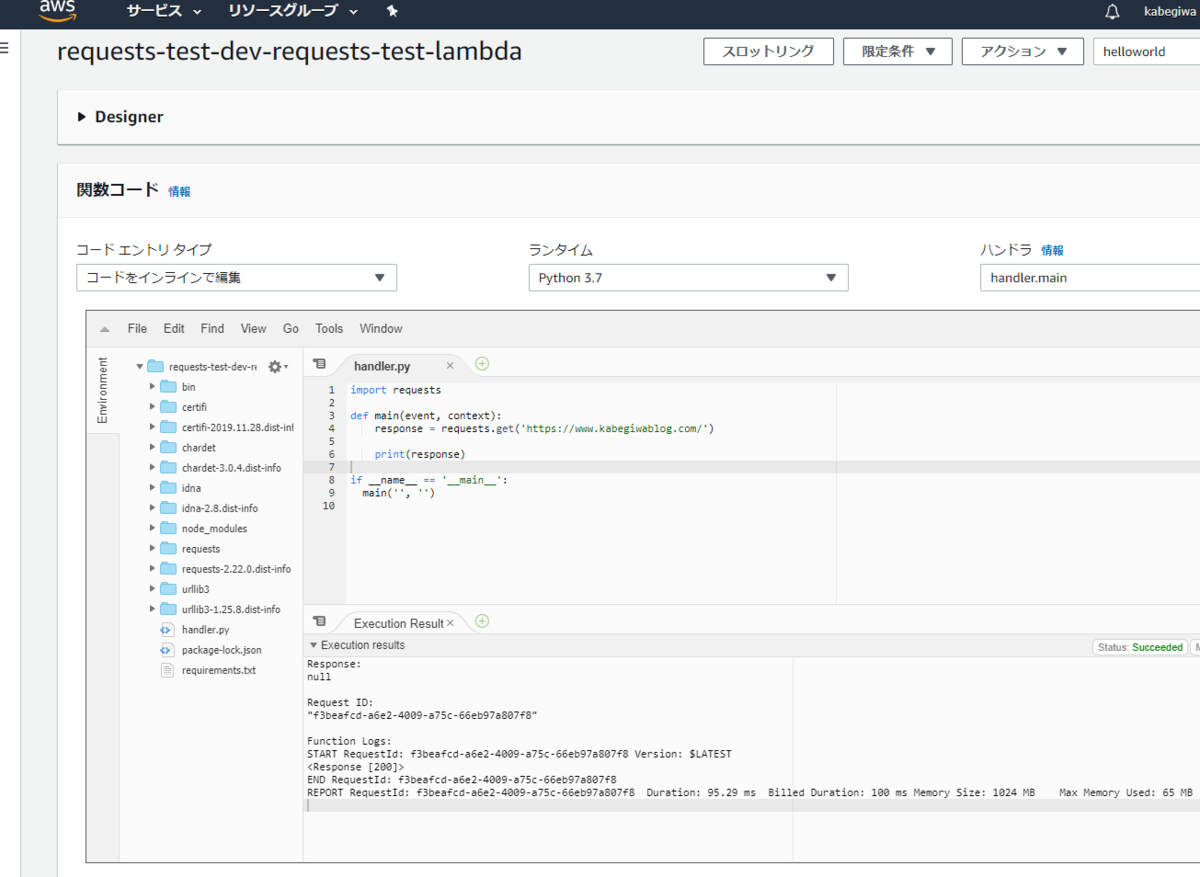
以下コマンドを実行してあげると、AWS環境にLambda関数がデプロイされます。
裏でCloudFormationがうごいています。
$ sls deploy

Serverless: Generated requirements from /home/vagrant/requests_test/requirements.txt in /home/vagrant/requests_test/.serverless/requirements.txt...
Serverless: Installing requirements from /home/vagrant/.cache/serverless-python-requirements/f866cf90d6349902a899d904a8c7724b092b63ed16fa2530c859ec177d70c68e_slspyc/requirements.txt ...
Serverless: Using download cache directory /home/vagrant/.cache/serverless-python-requirements/downloadCacheslspyc
Serverless: Running ...
Serverless: Packaging service...
Serverless: Excluding development dependencies...
Serverless: Injecting required Python packages to package...
Serverless: Uploading CloudFormation file to S3...
Serverless: Uploading artifacts...
Serverless: Uploading service requests-test.zip file to S3 (1.92 MB)...
Serverless: Validating template...
Serverless: Updating Stack...
Serverless: Checking Stack update progress...
.........
Serverless: Stack update finished...
Service Information
service: requests-test
stage: dev
region: ap-northeast-1
stack: requests-test-dev
resources: 6
api keys:
  None
endpoints:
  None
functions:
  requests-test-lambda: requests-test-dev-requests-test-lambda
layers:
  None
Serverless: Run the "serverless" command to setup monitoring, troubleshooting and testing.
できました。

removeで全削除できます。
sls remove
べんりな世の中になりましたね。

CentOS7にServerless Frameworkをインストールしてみます。
Node.jsが必要です。
以下の手順を参考にインストールしましょう。
これだけ
sudo npm install -g serverless
sls --version
Framework Core: 1.62.0
Plugin: 3.3.0
SDK: 2.3.0
Components Core: 1.1.2
Components CLI: 1.4.0
できましたね
